Wearing the right shoe size to climb Kilimanjaro is mostly overlooked by many climbers and even some guides. The reasons for this are that it is generally believed that as long as a pair of shoes is not too old, that it fits comfortably, and your feet are problem-free, you have the right size and can maintain happy feet throughout your trek. Unfortunately, many people have never been properly measured for shoes and are not wearing shoes even close to the correct size. Happy feet then become a distant dream when trekking for long periods with a heavy pack, and the trial often ends with severe discomfort, blisters and, at times, even some lost nails. This essay will attempt to show why wearing the correct size of shoes is of vital importance for making your Kilimanjaro trek a comfortable success and will enable you to make the right choices when coming to purchase trekking shoes.
While it might not seem like a big deal for everyday wear, wearing ill-fitting shoes, especially when hiking or climbing mountains like Kilimanjaro, can lead to serious problems.
When shoes don’t fit well, issues like blisters, toe bang, and black toenails can arise. Blisters occur when there’s constant rubbing between the shoe and the skin, leading to fluid-filled bumps. Toe bang happens when your toes repeatedly hit the front of the shoe, causing irritation, inflammation, and bruising. Black toenails are a clear sign of toe bang.
For casual shoes, it’s important to have about a half-inch of space between your longest toe and the front of the shoe. Contrary to what many believe, your toes shouldn’t touch the end of the shoe. Some suggest buying shoes that are half a size larger than your usual size to ensure this space. Similarly, there should be some room on the sides of the shoe as well.
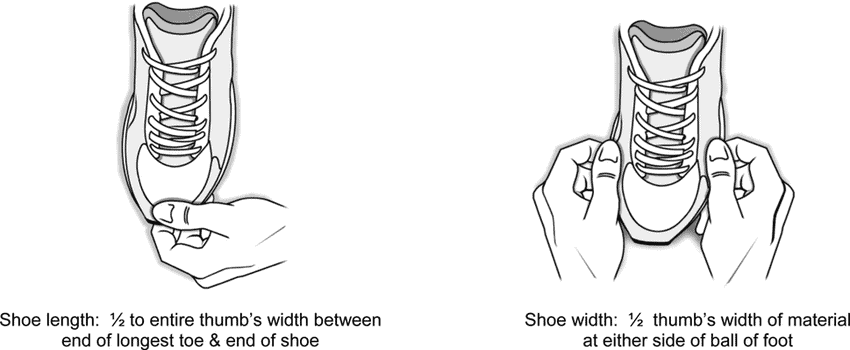 When it comes to hiking shoes, you’ll need even more space, up to a full inch, as your feet tend to swell more during strenuous activities. This extra space accommodates foot swelling and thicker socks worn during hikes. It’s crucial to ensure that your toes and the inside of your shoe or boot don’t touch at all.
Here are some factors to consider when sizing hiking footwear:
Foot Swell: During long hikes, the pressure from the ground and increased blood flow can cause your feet to swell. This swelling can range from half to a full shoe size difference. It’s recommended to try on shoes towards the end of the day when your feet are already swollen, and it’s better to go for a larger size to avoid discomfort.
Toe Box: The toe box should be spacious enough for your toes to wiggle comfortably. Your toes will swell along with the rest of your foot, so make sure they don’t feel cramped inside the shoe.
Heel Cup: The heel cup, which supports the bottom of your heel, should fit naturally without any unevenness or discomfort. Proper heel support is crucial for balance and stability during hikes.
Professional fitting at outdoor specialty stores like REI is recommended for hiking boots or shoes. Additionally, trying out different lacing techniques during training hikes can improve comfort and fit. Experimenting with lacing methods can make your shoes more comfortable and better fitting overall.
Ultimately, wearing properly fitted shoes is essential for a comfortable and enjoyable hiking experience. So, take the time to find the right size and fit for your feet before embarking on your next adventure.
Here is comparison chart dfor shoe siezes and fits
1.1. Importance of Wearing the Right Shoe Size
Determining the right shoe size is an important factor in getting the right shoe for you. It is, however, not an easy process, as different manufacturers have different ideas about sizing, plus the only real test is how the shoe fits and feels. Given the same foot size, you may require a bigger size of shoe than someone else, as the overall volume of your foot is greater. It is useful to know what your European size is, as this is a common reference in shoe sizes which various manufacturers work from. To determine the size of foot for a given shoe, trace around your foot and measure the length. Then use this length to find the corresponding size of shoe. Standard lengths are laid down in a Brannock device, which measures the length of the foot from heel to toe. This method is used in generating the standard shoe size and width tables.
1.2. Impact of Incorrect Shoe Size on Climbing Kilimanjaro
Likened to a twisted ankle, when descending a steep slope, a small foot will cause you to keep your weight on the outside of your foot and the ankle will start to twist. This can often cause a slip or a fall. An overlarge shoe will not give you enough support and again your feet will move too much within the boot. This can lead to a variety of painful foot problems and can even result in frostbite in extreme high-altitude conditions.
The undeniable stress of climbing Kilimanjaro will be enough torture for your feet. Your body must be as comfortable as possible to avoid exhaustion. Imagine climbing in footwear that is too small and the constant pain you will inflict on your feet. In extreme cases, this can cause nail loss and tissue damage. On the flip side, if the footwear is too big, the foot will constantly be moving and the friction can cause blisters.
Hiking or climbing, especially Kilimanjaro, can be a hazardous activity. I’ve seen people with feet ruined by ill-fitting boots, and heels can be incredibly painful in the boots. Blisters can stop you from reaching your goal because the skin and the boot spread the pressure of the load from the bones to the fat pad. Then, blisters often develop underneath the ball of the foot. Those with an incredibly tight boot will get blisters in the same place caused by pressure from the bones on the skin.
Determining the Correct Shoe Size
To determine the correct shoe size, Dee Fazio recommends first measuring foot length by standing on a piece of paper and drawing the outline of your foot. To measure toe room, she suggests taping the outline to a table and drawing a straight line from the bottom of your big toe to the end of your heel. Most reliable is the method recommended by Wisconsin University which instructs to measure foot length with the heel against a wall, and mark the top of the big toe before taking the measurement. This method will eliminate the question of how much space is needed at the end of the toes. Dee says to find width size, the best way is to check the width of your foot against what the chart corresponding to the length of your foot recommends. Both Fazio and Shelly Olsen agree that the key to finding the correct shoe size is trial and error but also agree that some methods are better than others. Fazio warns against using the method of pulling the insole out of the shoe and standing on it to determine how much space is needed at the end of the toes. Olsen warns that the method of pressing your foot to the front of the shoe and checking for enough space (between the back of your heel and the back of the shoe) to fit your finger is not a good method to find this space. She says “This is not good because when you hike, your foot slides forward as it becomes tired and takes on more water in wet conditions. The end result is bruised toes.”
Measuring Foot Length and Width
The length and width of the foot is measured in millimeters. For the length, the subject must stand barefoot and the weight of the body equally distributed on both feet. Underneath the foot is a piece of paper with two marks, one at the heel and the other at the longest toe. Using a ruler, measure the distance between the two points and take note of the longest foot length. The same process is used for the foot width. However, rather than between the toes, the distance is measured between the two points on the sides of the foot that are equidistant from the heel and the longest toe. Take note of the widest foot width. With knowledge of these measurements, Bestard boot length and width charts, and boot fit specifications, those at Bestard determined their correct size to show an accurate percentage and number distribution of the most comfortable fitting boot sizes.
Considering Arch Type
When assessing your arch type, you will have to figure out whether it is high, normal or low. An easy way to determine the type is the wet test. The wet test is performed by wetting the bottom of your foot, then placing it on a surface which will show the footprint – like a brown paper bag, or dark piece of construction paper. For a high arch, the print on the paper will be of only the heel and the ball of the foot, with little to no indication of the arch area connecting the two. A normal arch will show the heel and ball of the foot, but also a distinct curve along the inside. The width of the arch will be indicative of foot pronation, with a larger curve meaning more pronation. Finally, a low arch will show the entire foot, with little curve along the inside. The lower the arch, the heavier the pronation. These results are important as a high arch will be best suited to a cushioned midsole shoe, and a stable midsole is best for a low arch. These shoes provide the necessary support and comfort for the heavy load put on the foot when on a hike with a large pack. A person with a normal arch has many options, but can generally get away with wearing light hiking shoes. Although hiking shoes are recommended for everyone going to Kilimanjaro, it will be possible to determine your arch type and choose the necessary type of shoe.
Factoring in Toe Room
Stephane Pennequin (i.e. how coming down a ‘no edge’ can get you a better edge than a shoe with more edge) in his Kendo footwear interim report said that for steep and overhanging ground, taking a more aggressive shoe and downsizing it a little is the better option. This makes it clear that a specialized shoe, more downsized than a cheap alternative, is often the better choice. A smaller shoe is essential for the ascent or bouldering, where a tighter shoe is acceptable in short periods and shoe removal is possible.
This choice in shoe size will also let you consider going down a half size in the event of swelling (a reasonably frequent occurrence). This is not always possible if you have made a tight shoe purchase.
Any of which were what hindsight suggested ideal. Clearly, getting the joint between the foot and the big toe to sit behind the joint in the shoe is ideal. This will make walking downhill significantly easier in the event of a sprain or injury.
Choosing the Right Shoe for Kilimanjaro
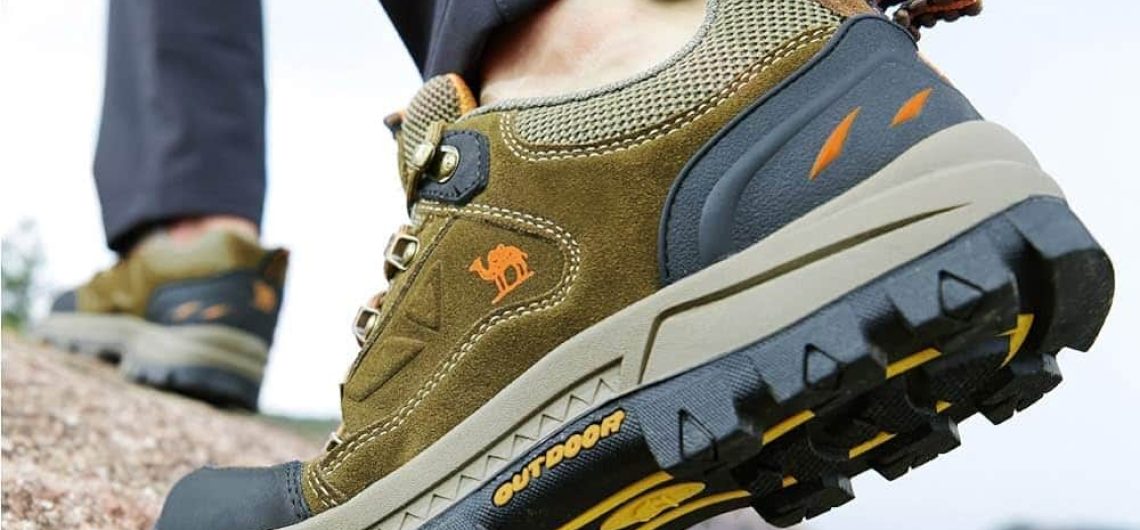
Although one of the most important pieces of gear when trekking Kilimanjaro is a good pair of boots, there is good reason that Africa’s highest mountain has been dubbed “Everyman’s Everest” and is often called a trek, walk-up or hike. The fact that you don’t need prior experience and you don’t have to “climb” per se makes Kili possible in tennis shoes. I emphasize the word possible and not recommend. Many different types of footwear have been used on Kilimanjaro with varying degrees of success. If you already have a good pair of high top, above-the-ankle, waterproof hiking boots then you can use them, if not it might be a good excuse to go buy some. You want your footwear to provide good support for rough trails, protect your feet from rocks and water and provide good stability. A boot meeting this description will serve you well when trekking through many other places in the world. That said, some avid hikers that dislike hiking boots have chosen to use trail shoes and have done fairly well. Still others have used athletic shoes for this trek. If it’s all you have and you are on a tight budget then tennis shoes would be better than wearing them old and ragged.
Understanding Different Types of Climbing Shoes
A beginner climber is best to choose a neutral shoe or a moderate shoe for their first climbing shoe. This way the climber can gauge what type of climbing they’ll be doing most and what style of shoe would best suit that type of climb. The beginner should avoid purchasing a top end expensive technical shoe until they feel that their climbing ability justifies the use of that shoe.
Neutral shoes are designed for climbing low angle terrain or long routes. They are the most comfortable type of climbing shoe for long term wear and are relatively inexpensive. A neutral shoe should neither feel too tight nor too loose. Moderate shoes are a jack of all trades style shoe which are designed for climbers who probably only want to own one pair of shoes and do a variety of climbs. This shoe is usually designed with a slight downturn and has a thinner sole than a neutral shoe, making it less comfortable for standing around in but more sensitive on the rock. Aggressive shoes are designed to be technical climbing shoes which can grip small edges. They are downturned, tight fitting, and have a thinner sole, which gives the climber more feel on the rock.
The vast array of climbing shoes, which varies from price, to design, to fit, to closure, is a true reflection of the competitive market regarding climbing equipment. With so many options deciding on the right type of shoe can be a complicated task for novice climbers yet the decision is critical regarding comfort, safety, and performance. There are three primary types of climbing shoes, which can be roughly categorized by the terrain that they are designed to climb; these are neutral shoes, moderate shoes, and aggressive shoes.
Selecting the Appropriate Shoe Style
No matter what footwear you intend to use, it is your duty to break in your footwear and get your feet accustomed to what they will be wearing during your trek up Kilimanjaro. Failure to do so will cause discomfort during your trek (i.e. blisters) and can create a frustrating experience.
For the most part, a good hiking boot is best for tackling the mountain, though many will find that trail shoes work just as well. Try to stay away from leather boots, as they are heavier and can prove troublesome when trying to keep the weight of your pack down. Leather is also not as breathable as other materials and will cause your feet to become hotter, promoting excessive sweating which can in turn soften the skin and lead to blisters.
When ascending to the top of Mount Kilimanjaro, the climb can best be categorized as a “hike and/or walk”. For this reason, it is important to take into consideration the type of walking shoes that will be worn during your trek. Mount Kilimanjaro can be climbed using many different types of footwear, however it is best to choose a boot or shoe that meets the demands of the particular trek that you will be attempting. There are a variety of routes up the mountain, each with their own degree of difficulty and each with their own specific type of footwear.
Evaluating the Shoe’s Traction and Grip
When evaluating the traction and grip of a hiking shoe, the first step is to take a look at the bottom of the shoe. There are a variety of different patterns, each with a different purpose. If you’re planning on doing the Machame or Umbwe routes, both of which are steep and more difficult, you’ll want a shoe that has small, sticky rubber lugs, so that the shoe grips well on smooth surfaces while providing better traction on mud and wet ground. If you go for too large a lug, it would be uncomfortable on the smooth ground covered at the beginning of the Lemosho route. You want to make sure you find a good balance that suits the shoe to the route. If you’re doing the Marangu route or the Rongai route, which are the more simple and touristy routes, a hiking shoe which is more trekker orientated may be suitable. These shoes have small lugs and are much lighter, meaning they’re far less durable, but can provide decent traction and grip on the easier trails. Run your hand over the lugs, if they feel soft, it usually means they will provide better traction. Hard lugs tend to be more durable, but can be quite slippery on wet or smooth surfaces. The second factor to take into consideration is the shoe’s ability to prevent ankle rolling. This is extremely important, particularly on the more difficult and uneven trails, and having good ankle support can be the difference between continuing a climb and turning back due to an ankle injury. High-cut boots generally provide the best ankle support and they’re also the best type of shoe to wear if you know you’ve had previous problems with ankle stability. However, leather hikers and light hikers can be suitable as long as they have solid ankle support. Ensure that the shoe fits properly around the ankle and that it feels secure.
Trying On and Testing the Shoes
Once you have found a size you think will fit, walk around the store for at least twenty minutes, allowing the padding in the boots to compress and conform to your feet. Note any pressure points or areas of discomfort in the boots. When you remove the boots, look for any red spots on your feet, as this may indicate areas that will become irritated on the mountain. This can be a difficult process, as the habit of hiking in uncomfortable footwear is so ingrained in trekking culture that many people do not know what a properly fitting boot feels like.
Assessing Comfort and Fit
Begin by wearing the socks you would normally wear while climbing. Push your foot forward in the boot until your toes touch the front, and try to get your index finger behind your heel. If you can’t get the finger behind your heel, the boot may be too small. When you push your toes forward, you should have just enough room to pinch the fabric at the front of the boot. If there is a large gap, the boot may be too big.
The first step to finding the right boots is to try on many different sizes and brands. Sizes will vary slightly among the different brands and a big size from one company may be the same as a half size larger from another.
4.1. Importance of Trying On Multiple Sizes
“It is crucial to make sure you buy the right shoe size and have them fitted properly,” said Gary Scott, a veteran mountaineering guide who has led many climbs to the summit of Kilimanjaro. “It sounds simple, but an amazing number of people don’t have properly fitted boots.”
Importance of Trying On Multiple Sizes
The best method for finding the right size is to spend time trying on multiple pairs from different manufacturers. For boots, often given the extra weight and size of the pack, a half to one full size larger than your street shoe is a good choice. You may also need to go up an additional half size if you spend a lot of time on your feet during the approach hike. An often overlooked consideration is the fact that your feet will swell during a long day on the trail. Be sure to leave some room (3/8″ to ½”) in the toe box to accommodate this swelling. Failing to try on multiple sizes to find the ideal fit, and failing to leave adequate room in the toe box to accommodate foot swelling can lead to discomfort such as blisters and black toenails, which are the most common ailments suffered on the mountain. Blisters and black nails are a result of the foot sliding forward in the boot, the toes hitting the end of the boot, or the feet moving laterally on descents. This will only occur if the boot is too large or too small. No matter how well the boot has been rated, is made, or how much someone recommends it, if it is the wrong size and width it will not be comfortable and will not perform as desired.
Assessing Comfort and Fit
This is the most important part of shoe fitting. It is very important to remember that soon, the shoes may begin to hurt when walking long distances. This could cause serious discomfort on your Kilimanjaro trek and could even lead to blisters, which could ruin your chances of reaching the summit. Properly fitting shoes should feel good when first tried on and should not rub or chafe anywhere. The shoes should feel supportive and comfortable when sitting and when walking up and down hill. If this is the case then they are likely to be the right size and well fitting. Test this by walking up and down a steep incline. If your toes are touching the front of the shoe when going downhill, then the shoes are too small. Your toes should never touch the front of the shoe and you should have adequate space to wriggle them. If your feet are sliding forward in the shoes when going downhill then the shoes are too big.
Walking and Testing the Shoes
Your main test for shoe fit and comfort will come from walking around in them. Remember to have your hiking socks on when you do this. Walk up and down stairs, walk on an incline if possible, and do some casual walking on the flat. It is ideal if you can walk on a treadmill for 10 minutes for a really good test of the shoes/boots. This will simulate the repetitive nature of walking and show up any potential discomfort. Also try wearing the shoes for a couple of hours around the house, as this will give a good idea of how they feel after wearing them for a while. An example of this was shown in testing shoes on Kilimanjaro. Two of our staff members wore an identical pair of shoes from one of the top brands. Despite the fact that the same model was being worn, they had very different outcomes. One staff member wore them on consecutive treks up Snowdon and Ben Nevis. Despite the fact that they were well worn in, he found them very uncomfortable and got severe blisters. The second staff member wore them only for casual use before wearing them on Kilimanjaro. Despite them not being fully worn in, he found them comfortable and did not get a single blister. This example just goes to show that the comfort of the shoes may be disjointed from how worn in they are. It is thus essential that you can wear them a few times to draw out the real comfort that can be had from them. This in turn will allow you to decide whether to stick with the same model, or to try a different pair, brand or size.
Ensuring Proper Shoe Size During the Climb
Many climbers are rather surprised at the variation in foot size experienced during a climb. Feet size commonly increases by up to one full size, though the increase is generally greatest in those individuals with foot and ankle injury. Fluid accumulates in the foot and leg during the day and is mobilized at night. This nightly fluid mobilization combined with the effects of gravity results in increased swelling of the foot during the day. If you have had a previous foot or ankle injury, you can expect even more local foot swelling. This can cause quite tight spots in the boot which can lead to pressure problems and circulatory restriction. If the problem is mild, simply loosening the laces a little can be all that is necessary. More significant swelling may require re-lacing the boot to eliminate the tight spot and in some cases it will be necessary to make adjustments to the boot itself. This is often best done in the evening when the foot is most swollen. Shell and lining materials can be moulded reasonably simply using the application of heat. A hair dryer can be used to soften specific areas for reshaping in the case of plastic boots. With leather it is possible to soften the boots with water and then use the heat from a stove or fire. Bear in mind that excess of heat will weaken leather and can cause delamination in the case of plastic boots. Boot volume can also be increased by a variety of grinding techniques, though some methods are best performed by a specialist boot technician. It may be easier to consult a podiatrist who can guide you on padding the boot in such a way as to accommodate a foot deformity due to previous injury. In extreme cases it may be best to have a second pair of boots with a size increase. Remember, prevention of tight spots in the first place is the ideal scenario, as significant boot modification can cause further problems.
Monitoring Foot Swelling and Adjusting Laces
Begin monitoring your feet for swelling even before your climb. Feet swell considerably on Kilimanjaro compared to sea level, and the feet on an individual may swell at different rates. For instance, on a climb in July 2008, it was noted that one individual’s left foot swelled so much more than her right, that she had to adjust the laces on her boot to two different tensions. You may need to stop during your hike to adjust your boot size. If your feet begin to feel hot or develop a “hot spot” (a pre-blister state), this can be a sign that your boots or laces are too tight. Loosening your laces can relieve pressure on a specific part of the foot. If boots feel too tight in general, you can use a trekking pole to unbuckle the boot. And finally, if your feet swell so much that you feel your boots are too small, you may need to pull a boot switch with a crew member.
Using Insoles and Cushioning for Added Comfort
Insoles act as a secondary foundation for the feet, and certain types can compensate for high or low foot arches and provide greater stability for ascents and descents. They provide comfort that goes beyond what a boot might normally offer if a consumer is willing to experiment with different models, sizes, and materials. Insoles and cushioning can also be used to tighten the cosmetic fit of a boot. Some low volume feet may feel comfortable in a boot but experience slippage resulting in blistering. This is because the foot is moving around too much. By placing a thin insole at the bottom of the boot and perhaps a slightly thicker one on the sides and top of the foot, the foot is held in place snugly and securely. This simple method can decrease the chance of blistering and abrasion. Customers should be aware, however, that increased cushioning that surrounds the foot without molding to it can cause lateral movement of the foot and hence blistering. If the customer feels this is happening but wishes to remain the insoles, then duct tape can be placed around the boot in areas where slippage is occurring. This is a trial and error method, and many iterations of different insole and tape combinations may be required.
Regularly Checking for Blister Formation
Blisters are areas of skin irritation, which form as a result of prolonged friction on the same spot over time. They are accumulations of clear fluid between separated layers of skin. Blisters can occur anywhere on the feet, and are the result of shoes not providing the proper fit, excessive moisture, foreign substances inside the socks, or from skin ailments. Blisters are a common occurrence during a mountaineering or trekking expedition and are the result of the rubbing of the heel or toes, with the constant change in incline and decline. However, blisters can be minimized with the right shoe and moisture management. This would involve having a well-fitting and broken-in pair of shoes that are the correct size. Blisters are best managed by prevention with the use of: moleskin and taping, proper blister drainage, and using dressings to protect or cushion the blister area. This can pose a significant goal on an expedition such as Kilimanjaro, in which foot hygiene and body comfort can play a large role in the overall success of the climb. Feet with blisters can be uncomfortable and painful, in severe cases even affecting the way a person walks and their ability to carry out essential tasks. An injury to the feet or blisters can also cause damage to the skin, allowing bacteria to enter and cause infection. This would ultimately end an expedition or trek, and in a worst-case scenario, poorly treated blisters can cause systemic infection or sepsis. In treating blisters and preventing any more from forming, shoe size and the way in which the footwear fits is key.
![]()