
Trekking Conditions
You will get drinking water during your climb. Water is tapped from streams, boiled, and treated with purifying tablets along the routes of climbing Kilimanjaro. Water is really important for acclimatization purposes to minimize and avoid altitude sickness. Make sure you bring enough water on the first day; the rest of the days’ water will be provided, especially at your camp.
More about Mount Kilimanjaro Meals and Water
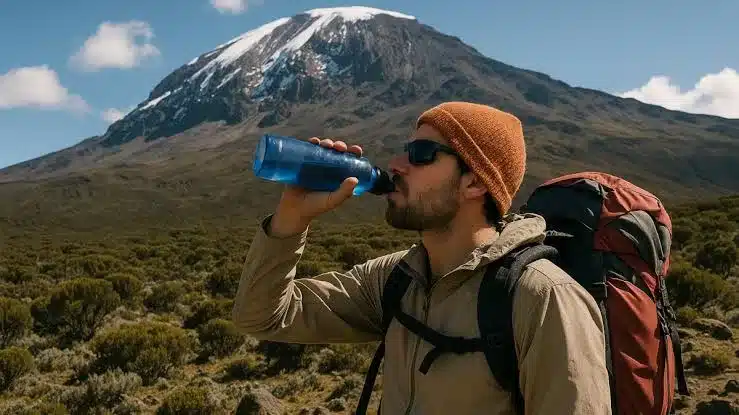
How Water Is Handled on the Mountain
- Your crew collects water from streams and natural sources along the route.
- The water is boiled or treated with purification tablets/chemicals to make it safe to drink.
- Hot and cold treated water is available at every meal and at camp.
- You can refill your water bottles or hydration bladder multiple times per day.
How Much Water You Need
- Aim to drink 3–5 liters per day (more on summit day).
- Most climbers carry a hydration bladder (2–3L) in their daypack + an extra bottle.
Practical Tips
- Bring a water filter or extra purification tablets if you want extra peace of mind (though the crew’s treatment is generally reliable).
- Drink warm water in the mornings and evenings — it helps with hydration at altitude.
- Avoid buying bottled water on the mountain — it’s expensive, creates plastic waste, and is unnecessary.
Important: Never drink untreated stream water directly. Always use the water provided by your crew.
Would you like recommendations for the best water bottles or hydration systems for the trek?

Yes, there are some real advantages to climbing Kilimanjaro during a full moon, especially on summit night. Many climbers and guides consider it one of the best times to go. This is really a matter of personal preferences. On a full moon, there is lots more light, and the route and path to the summit are much clearer. Some people prefer this; some prefer to get their heads down and just keep plodding. Of course, when there is a full moon, there are almost no stars visible, so if you want a great night sky, give the full moon dates a miss.
Here’s why:
Main Advantages
- Better visibility on summit night — The final push starts around midnight in complete darkness. A full moon provides natural light, reducing the need for headlamps and making the rocky, scree-covered trail easier (and safer) to navigate.
- Magical atmosphere — The moonlit landscape, especially the crater rim and glaciers, creates an unforgettable, almost spiritual experience. Many say it’s the most beautiful and memorable summit they’ve ever done.
- Slightly easier navigation — Less chance of tripping or losing the path in the dark, which can help with fatigue and confidence.
Below are our group joining full moon climb itineraries for Kilimanjaro.
- 10 days Lemosho Group Joining & Full moon trek
- 9 days Machame Route Group Joining & Full moon trek
- 11 days Group Joining via Northern Circuit & Full Moon Trek
- 8 days Marangu Route Group Joining & Full moon trek
- 9 days Rongai Route Group Joining & Full moon trek
Other Considerations
- Crowds — Full moon dates are popular, so certain routes (especially Machame and Marangu) can be busier.
- Weather — A full moon doesn’t guarantee good weather, but clear nights are more common, enhancing the moonlight effect.
- Scheduling — Full moon climbs are offered by many operators as special departures. They book up early.
Is It Worth It?
For most people, yes — the enhanced summit night experience is a big plus. If you’re choosing dates anyway, aligning with a full moon (or near-full) is a nice bonus, especially if it’s your first time. Check with your operator (e.g., Tranquil Kilimanjaro often runs full moon trips). They can confirm the exact dates and any special arrangements. It can turn an already epic climb into something truly magical!
7 ways to hike Kilimanjaro under The Full Moon, an adventure you cannot afford to miss!
The public toilets on Mount Kilimanjaro are pretty basic. Private toilets for Kilimanjaro climbs are the best solution and alternative as they are more hygienic and offer better comfort and privacy than long drop toilets or pit latrines that are meant for public use on the mountain.
More information about the toilets on Mount Kilimanjaro here.
Toilets on Mount Kilimanjaro are very basic—expect simple long-drop pit latrines rather than modern facilities. They are functional but can be unpleasant, especially at busy camps or higher altitudes.
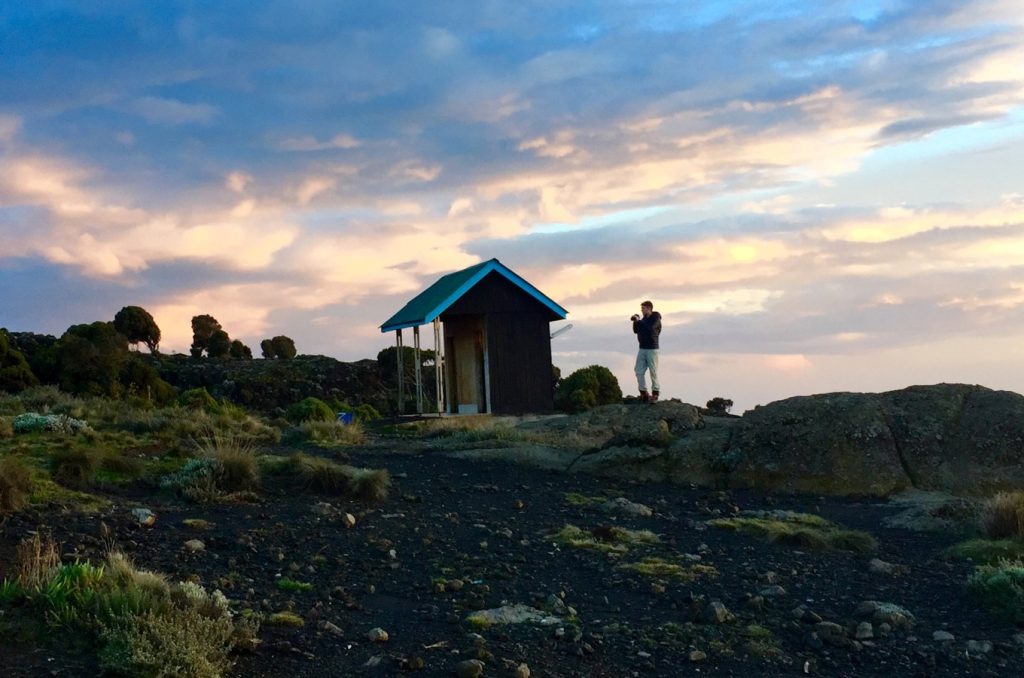
Here’s what to expect:
Public Toilets (Standard on Most Climbs)
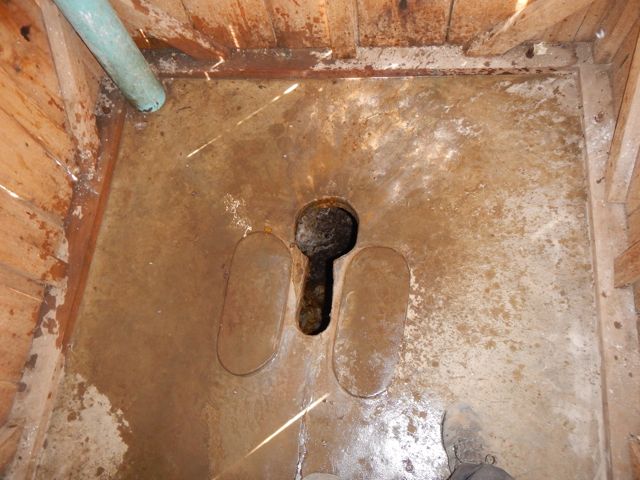
- Design — Wooden (or sometimes concrete) huts built over a deep hole in the ground. You squat over a platform or hole (no Western-style seats in most cases).
- Condition — Varies widely. Some are reasonably clean (especially early in the day), but many become smelly, dirty, or slippery due to high use, lack of water, and altitude. Doors may not lock (or exist), and there’s no running water or toilet paper provided.
- Privacy & comfort — Minimal. They can be crowded at popular camps, cold/windy at night, and a trek in the dark from your tent.
- Higher camps — Conditions often worsen (e.g., at Barafu or Kosovo) due to fewer maintenance visits and harsher weather.
Private Toilet Tents (Popular Upgrade)
Many mid-range and premium operators offer private portable toilet tents for an extra fee. These are:
- A small tent with a bucket-style or basic toilet seat.
- Maintained by a dedicated porter (emptied and cleaned regularly).
- Much cleaner, more private, and conveniently located near your tent.
This is highly recommended by many climbers for hygiene and convenience, especially on longer trips or for those with sensitive stomachs.
View this post on Instagram
Practical Tips
- Bring your own supplies — Toilet paper, hand sanitizer, wet wipes, and a headlamp for nighttime visits. Pack out used paper if required.
- Daytime alternative — Some people use the outdoors (with proper Leave No Trace practices) when possible, but stick to toilets at camp.
- Hygiene — Wash or sanitize hands thoroughly. Stomach issues are common at altitude, so good habits help.
Toilets are one of the less glamorous aspects of the climb, but they’re part of the adventure. A good operator keeps them as manageable as possible. If hygiene is a big concern, ask about private toilet options when booking.
Because of the higher altitude, Kilimanjaro is the most difficult.
The Inca Trail is 4200 meters above sea level, whereas Kilimanjaro is 5,895m, and both walks are classified as moderate (Inca Trail) and difficult (Kilimanjaro) by tour providers.
The main reason is altitude. While both are non-technical treks (no ropes or climbing gear required), Kilimanjaro pushes you to nearly 6,000m (19,341 ft), whereas the Inca Trail’s highest point is only about 4,215m (13,828 ft) at Dead Woman’s Pass.Quick Comparison
| Factor | Kilimanjaro | Inca Trail | Winner (Harder) |
|---|---|---|---|
| Max Altitude | 5,895 m (19,341 ft) | 4,215 m (13,828 ft) | Kilimanjaro |
| Typical Duration | 6–9 days | 4 days | Kilimanjaro |
| Elevation Gain | ~4,000–4,700 m total (varies by route) | ~2,000–2,200 m total | Kilimanjaro |
| Terrain | Varied (jungle → alpine desert → scree/snow) | Steep Inca stone steps, uneven paths | Inca Trail (steps) |
| Summit Day | Extremely long & tough (10–18 hrs) | No single “summit day” | Kilimanjaro |
| Altitude Sickness Risk | High | Moderate | Kilimanjaro |
| Success Rate | 60–95%+ (depends heavily on route) | >95% | Inca Trail |
| Physical Demand | Endurance + altitude | Leg strength + stairs | Depends on person |
Why Kilimanjaro Is Usually Harder
- Altitude is the biggest factor. Even very fit people can struggle with Acute Mountain Sickness (AMS) on Kilimanjaro because you ascend quickly relative to the height. The final summit push starts in the middle of the night in freezing temperatures and thin air.
- Longer overall commitment (more days at increasing altitude).
- The terrain near the summit (loose scree) can be exhausting.
- Success rates are noticeably lower than on the Inca Trail unless you choose a longer, better-acclimatizing route (e.g., 8-day Lemosho or Northern Circuit).
Why the Inca Trail Can Still Feel Brutal
- The stone steps are relentless — some days involve thousands of steep Inca steps going up and down.
- Multiple big passes with significant elevation change each day.
- It can be very hard on knees, ankles, and quads, especially on the descents.
- Some very fit hikers who handle altitude well actually find the Inca Trail more physically punishing because of the stairs and constant undulation.
It Depends on You
- Kilimanjaro feels harder if your main weakness is altitude or long endurance days.The
- Inca Trail can feel harder if you have knee/joint issues or hate steep stairs.
- Many people who have done both say Kilimanjaro is the bigger challenge overall, especially the mental and physical toll of the summit day.
Bottom Line
| Your Profile | Which Is Harder for You? |
|---|---|
| Average fitness, no altitude experience | Kilimanjaro |
| Excellent cardio, good with altitude | Still Kilimanjaro (usually) |
| Knee problems or hate stairs | Inca Trail |
| Very experienced high-altitude trekker | Closer, but Kili still edges it |
Mount Kilimanjaro porters do the most tidious work along the route on typical hiking days. They carry all the luggage and make sure everything is prepared before you reach the campsite. A water bottle, raincoat, some candy, and peanuts will be most of the weight you’ll be carrying. Tents, food, stoves, and gear are carried by porters and pitch the tents on time.
On a typical Kilimanjaro climb, you don’t have a fixed number of “personal” porters — the crew is shared for the group. The standard ratio is 2 to 4 porters per climber, with 3 porters per climber being the most common average for tented routes.
Typical Crew Breakdown
Here’s what a standard 7-day climb usually looks like:
| Group Size | Guides / Assistant Guides | Cook(s) | Porters | Total Crew (approx.) |
|---|---|---|---|---|
| 1 solo climber | 1–2 guides | 1 | 5–7 | 7–10 |
| 2 climbers | 1 lead + 1 assistant | 1 | 6–10 | 9–14 |
| 4 climbers | 1–2 leads + 1–2 assistants | 1 | 10–16 | 14–21 |
| Larger groups | Scales up | 1–2 | 3+ per climber | Much larger |
- Why so many porters? Each porter is legally limited to carrying 20 kg (44 lbs) of group gear + their own kit. They carry tents, sleeping bags, food, water, cooking equipment, and your duffel bag (usually up to 15–20 kg). Everything for 6–9 days on the mountain must go up and down.
- Longer routes (e.g., 8–9 day Lemosho or Northern Circuit) need more porters because of extra food and supplies.
- Marangu Route (hut route) needs fewer porters (often 2 per climber) since you don’t carry tents and sleeping gear.
- Budget operators may try to use fewer porters (overloading them, which is unethical). Reputable/KPAP-certified operators follow the 20 kg rule and use the proper ratio.
1. CAMPING Route allocation of porters (Tented)
| Pax | Crew Size | Guides | Assistant Guides | Cook | Porters | Food Cost |
|---|---|---|---|---|---|---|
| 1PAX | CREW 7 | (1 guide) | 0AG | 1 cook | 5 porters | FOOD 20$/P |
| 2PAX | CREW 12 | (1 guide) | 1AG | 1 cook | 9 porters | FOOD 20$/P |
| 3PAX | CREW 15 | (1 guide) | 1AG | 1 cook | 12 porters | FOOD 17$/P |
| 4PAX | CREW 18 | (1 guide) | 2AG | 1 cook | 17 porters | FOOD 15$/P |
| 5PAX | CREW 21 | (1 guide) | 2AG | 1 cook | 19 porters | FOOD 15$/P |
| 6PAX | CREW 23 | (1 guide) | 3AG | 1 cook | 20 porters | FOOD 15$/P |
| 7PAX | CREW 25 | (1 guide) | 3AG | 1 cook | 22 porters | FOOD 15$/P |
| 8PAX | CREW 29 | (1 guide) | 4AG | 1 cook | 26 porters | FOOD 15$/P |
| 9PAX | CREW 32 | (1 guide) | 4AG | 1 cook | 30 porters | FOOD 15$/P |
| 10PAX | CREW 36 | (1 guide) | 5AG | 1 cook | 32 porters | FOOD 13$/P |
| 11PAX | CREW 39 | (1 guide) | 5AG | 1 cook | 37 porters | FOOD 13$/P |
| 12PAX | CREW 44 | (1 guide) | 6AG | 1 cook | 39 porters | FOOD 13$/P |
| 13PAX | CREW 47 | (1 guide) | 6AG | 1 cook | 43 porters | FOOD 13$/P |
| 14PAX | CREW 51 | (1 guide) | 6AG | 1 cook | 43 porters | FOOD 13$/P |
2. MARANGU Route (Hut)
| Pax | Crew Size | Guides | Assistant Guides | Cook | Porters | Food Cost |
|---|---|---|---|---|---|---|
| 1PAX | CREW 6 | (1 guide) | 0AG | 1 cook | 4 porters | FOOD 20$/P |
| 2PAX | CREW 10 | (1 guide) | 1AG | 1 cook | 6 porters | FOOD 20$/P |
| 3PAX | CREW 11 | (1 guide) | 1AG | 1 cook | 7 porters | FOOD 17$/P |
| 4PAX | CREW 13 | (1 guide) | 1AG | 1 cook | 10 porters | FOOD 17$/P |
| 5PAX | CREW 15 | (1 guide) | 2AG | 1 cook | 11 porters | FOOD 15$/P |
| 6PAX | CREW 17 | (1 guide) | 2AG | 1 cook | 13 porters | FOOD 15$/P |
| 7PAX | CREW 20 | (1 guide) | 3AG | 1 cook | 15 porters | FOOD 15$/P |
| 8PAX | CREW 23 | (1 guide) | 3AG | 1 cook | 18 porters | FOOD 15$/P |
| 9PAX | CREW 25 | (1 guide) | 4AG | 1 cook | 19 porters | FOOD 15$/P |
| 10PAX | CREW 27 | (1 guide) | 4AG | 1 cook | 21 porters | FOOD 15$/P |
| 11PAX | CREW 30 | (1 guide) | 5AG | 1 cook | 23 porters | FOOD 13$/P |
| 12PAX | CREW 32 | (1 guide) | 5AG | 1 cook | 25 porters | FOOD 13$/P |
| 13PAX | CREW 35 | (1 guide) | 6AG | 1 cook | 31 porters | FOOD 13$/P |
| 14PAX | CREW 37 | (1 guide) | 6AG | 1 cook | 40 porters | FOOD 13$/P |
3. MERU (Shorter climb)
| Pax | Crew Size | Guides | Assistant Guides | Cook | Porters | Food Cost |
|---|---|---|---|---|---|---|
| 1PAX | CREW 5 | (1 guide) | AG | 1 cook | porters | FOOD 30 |
| 2PAX | CREW 8 | (1 guide) | AG | 1 cook | porters | FOOD 20 |
| 3PAX | CREW 9 | (1 guide) | AG | 1 cook | porters | FOOD 20 |
| 4PAX | CREW 10 | (1 guide) | AG | 1 cook | porters | FOOD 20 |
| 5PAX | CREW 11 | (1 guide) | AG | 1 cook | porters | FOOD 20 |
| 6PAX | CREW 12 | (1 guide) | AG | 1 cook | porters | FOOD 20 |
| 7PAX | CREW 14 | (1 guide) | AG | 1 cook | porters | FOOD 20 |
| 8PAX | CREW 15 | (1 guide) | AG | 1 cook | porters | FOOD 20 |
| 9PAX | CREW 16 | (1 guide) | AG | 1 cook | porters | FOOD 20 |
Notes:
- PAX = Number of climbers
- Crew size increases with more people
- Food cost is per person ($/P)
- Marangu needs fewer porters because it uses huts (no tents to carry)
Full Support Crew Roles
- Lead Guide — Overall leader and safety.
- Assistant Guides — Help with pacing and summit support.
- Cook — Prepares all meals.
- Porters — Carry gear, set up camp, fetch water, etc.
- Sometimes, extra roles like toilet porter or waiter for bigger groups.
For most solo or couple climbs on popular routes, expect around 3 porters per climber, plus guides and a cook. Your operator will tell you the exact crew size during your briefing.
More about Kilimanjaro porters
For Mount Kilimanjaro, you need a 4-season sleeping bag with a comfort rating of -10°C to -18°C (14°F to 0°F).
Warmth. As previously stated, the nights on Kilimanjaro, or any high-altitude hiking adventure, may be quite chilly. As a result, your sleeping bag must be able to withstand extremely cold temperatures.
Recommended Temperature Ratings
- Ideal minimum: Comfort rating of 0°F / -18°C (or warmer). This is the most common recommendation from reputable operators and experienced climbers.
- Safe all-rounder: A bag with comfort rating -10°C to -15°C (14°F to 5°F) works well for most people.
- If you sleep cold, are female, or climbing in colder months: Go for -20°C / -29°F or lower (e.g., -20°F comfort rating).
Why This Rating?
Nighttime temperatures on the mountain drop significantly:
- Lower camps: Can be 5–10°C (41–50°F)
- High camps (e.g., Barafu or Crater Camp ~4,700–5,000 m): Often -5°C to -15°C (23°F to 5°F), sometimes colder with windchill.
- You’ll be sleeping at high altitude where your body is already stressed, and many people wear extra layers inside the bag.
Key Features to Look For
- Mummy shape with a good hood and draft collar (traps heat better).
- Down (lighter, more compressible) or high-quality synthetic (better in damp conditions).
- Weight: Ideally under 2–2.5 kg for easier carrying.
- Add a sleeping bag liner (adds 2–5°C of warmth and keeps the bag clean).
What Do the Ratings Mean?
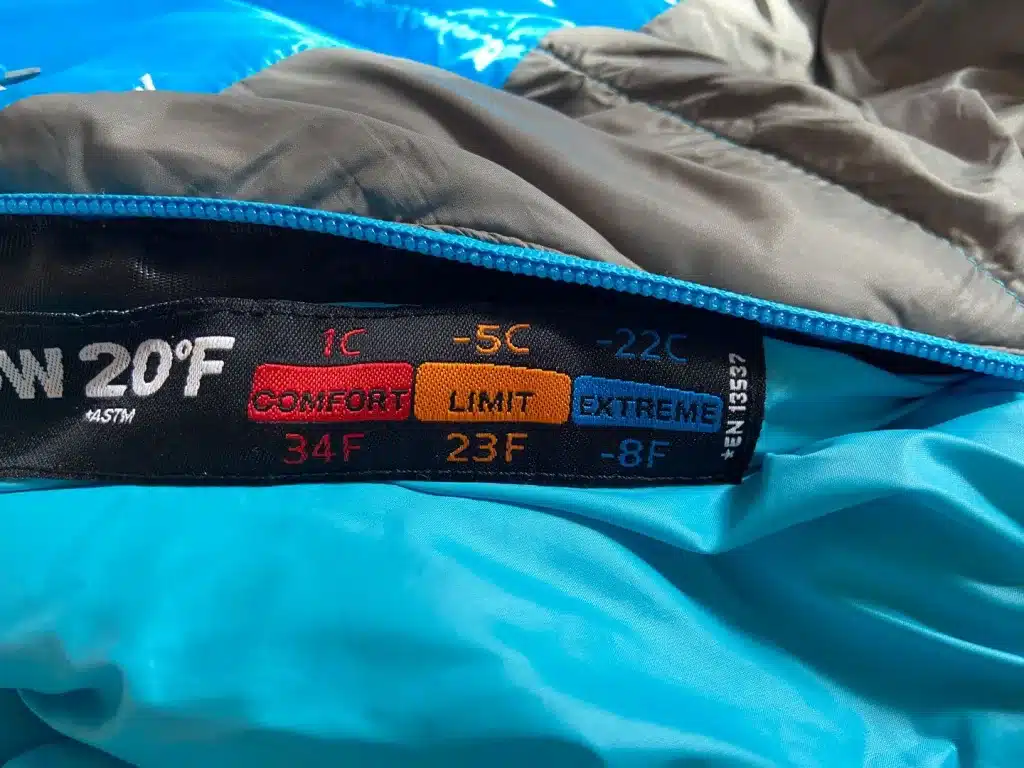
Modern sleeping bags use the EN 13537 / ISO 23537 standard (the official European testing standard). Every properly rated bag comes with three numbers:
| Rating | What It Means | Who It’s For | For Kilimanjaro? |
|---|---|---|---|
| Comfort | Temperature at which a woman (or cold sleeper) can sleep comfortably | Average female or cold sleeper | Most important number – Use this one |
| Limit | Temperature at which a man (or warm sleeper) can sleep in a curled position | Average male or warm sleeper | Use as a secondary reference |
| Extreme | Survival temperature (you will be very cold, possibly hypothermic) | Emergency use only | Ignore for normal use |
Example:
A bag labeled Comfort: -10°C / Limit: -16°C / Extreme: -35°C
→ This means a woman/cold sleeper should feel comfortable down to -10°C.
How to Check the Rating Properly
- Look for the EN/ISO label
- Reputable bags will have a tag or hangtag with the official EN 13537 numbers.
- Avoid cheap no-name bags that just say “-15°C” without specifying Comfort/Limit.
- Check the manufacturer’s website
- Go to the brand’s site (e.g., Marmot, Mountain Hardwear, Rab, Sea to Summit, North Face) and search the model.
- Good brands clearly list all three ratings + test conditions.
- Understand real-world adjustment
- Add extra warmth for Kilimanjaro because:
- You’re at high altitude (weaker recovery)
- You may be tired and dehydrated
- Wind and cold ground
- Rule of thumb: Choose a bag whose Comfort rating is 5–10°C colder than the lowest temperature you expect at camp.
- Add extra warmth for Kilimanjaro because:
Recommended Ratings for Kilimanjaro
- What sleeping bag would you recommend for climbing up Mount Kilimanjaro?
- Can I rent a sleeping bag and mattress for the Kilimanjaro climb?
- Importance of dry bags when packing for Kilimanjaro, and ziplocks or staff sacks for storing items
- The Recommended Sleeping Pad or Mat for Climbing Kilimanjaro
| Your Sleep Type | Recommended Comfort Rating |
|---|---|
| Sleep warm | 0°C to -10°C |
| Average sleeper | -10°C to -15°C |
| Sleep cold / female | -15°C to -20°C |
Best all-round choice for most climbers:
A bag with Comfort rating of -10°C to -18°C (14°F to 0°F).Extra Tips
- A good sleeping bag liner (silk or thermal) adds 2–5°C of warmth.
- Pair it with a good sleeping mat with R-value of 4+ (inflatable insulated mat).
- Many operators rent proper -15°C to -20°C bags for $20–40 for the whole trip.
Pro Tip: Many good operators rent proper sleeping bags (often -15°C to -20°C rated) for a small fee. This is a smart option if you don’t plan to use it often after the trip.Would you like specific sleeping bag model recommendations, rental info, or how to combine it with a sleeping mat for maximum warmth?
For Kilimanjaro summit night (the midnight push to Uhuru Peak), you need to prepare for extreme cold — typically -10°C to -20°C (14°F to -4°F), with windchill making it feel even colder (down to -25°C or lower). The climb lasts 10–18 hours, starting in total darkness and often finishing after sunrise. Since the final attempt to get to the summit of Mount Kilimanjaro begins in the dark hours of midnight, you will need these items to assist you in summiting Kilimanjaro. Lightweight duvet, thermal underwear, lightweight sleeping bag, stove, water purifiers, food, head torch, compass, gloves, hat, etc
Here’s the essential summit-night packing list (what you wear + carry in your daypack):
Upper Body Layers (Layering is Critical)
- Base layer: Moisture-wicking merino or synthetic long-sleeve top (e.g., Icebreaker or Smartwool)
- Mid layer: Another thermal top + fleece jacket or softshell
- Insulating layer: High-quality down jacket (650+ fill power, hooded) — this is your most important piece
- Outer shell: Waterproof/windproof hard-shell jacket (Gore-Tex or similar)
Lower Body
- Base layer: Thermal leggings or merino base bottoms
- Mid/Outer: Hiking pants + fleece pants or insulated ski-style pants (many people wear softshell pants with thermals underneath and add waterproof overpants)
Head, Face & Neck
- Balaclava or neck gaiter/buff (essential for wind and cold air)
- Warm beanie or fleece hat
- Headlamp with extra batteries (critical — summit night starts in the dark)
- Sunglasses or ski goggles (for snow/bright sun on descent)
- Lip balm + sunscreen (UV is intense at altitude)
Hands
- Liner gloves (thin inner pair)
- Heavy insulated gloves or mittens (water-resistant, warm — mittens are warmer for summit night)
Feet
- Warm trekking socks: Thick merino wool pair (plus liner socks if you use them)
- Hiking boots that are already well broken-in
- Gaiters (optional but helpful against scree and cold)
- Chemical hand/foot warmers (highly recommended by many climbers)
Daypack Essentials (8–12 kg / 18–25 lbs)
- 2–3 liters of water (use wide-mouth bottles or insulated bladder — bladders can freeze)
- High-energy snacks: Energy bars, nuts, chocolate, gummies, sandwiches from the cook
- Trekking poles (very useful on loose scree)
- Small first-aid kit (personal meds, blister plasters)
- Camera/phone + power bank (keep in inner pocket so battery doesn’t die in cold)
- Wet wipes / toilet paper
- Rain cover for your pack
Pro Tips for Summit Night
- Test your full summit outfit before the trip (wear it on a cold training hike).
- Put on all your warm layers at high camp before starting — it’s much harder to add layers once you’re moving and cold.
- Hand/foot warmers inside gloves and boots make a huge difference.
- Keep spare batteries and phone in an inner pocket close to your body (cold drains batteries fast).
- Eat and drink even if you don’t feel like it — summit night is when many people bonk due to low energy.
How cold is Mount Kilimanjaro at each zone including the top summit, Uhuru Peak
Would you like a full head-to-toe summit-night outfit example, or the complete packing list for the whole trek?