All high camps on Kilimanjaro serve as the final staging points for the summit push to Uhuru Peak (5,895 m / 19,341 ft), typically after 5–8 days of trekking depending on your route. Though not similar to Everest basecamp, Mount Kilimanjaro has a mixture of base camps, like Barafu and Kibo Hut, that serve multiple routes and high camps serving the same purposes. These camps sit in the harsh alpine desert zone (4,600–4,900 m), where oxygen is roughly half sea-level values, nights plummet to –10°C to –20°C, and the landscape turns to loose volcanic scree, boulders, and sparse lichens. From here, the classic “summit night” begins between midnight and 2 a.m. with headlamps cutting through darkness for a 6–9 hour grind upward, followed by a grueling descent. There are effectively five main high camps (plus the ultra-high Crater Camp option), used across the seven official routes. Routes converge on shared paths higher up, but your high camp determines the exact starting elevation, crowd level, distance to the crater rim, and which sub-summit (Stella Point or Gilman’s Point) you hit first. Longer, non-touristic routes like the Northern Circuit or extended Lemosho often allow quieter or higher camps, giving better acclimatization and a slight edge on summit night. Here’s a complete breakdown of every high camp, the routes that use it, and the precise journey from that camp to Uhuru Peak (based on standard 2026–2028 operator itineraries and climber reports). All distances and times are approximate; actuals vary with fitness, weather, and pacing (“pole pole”).
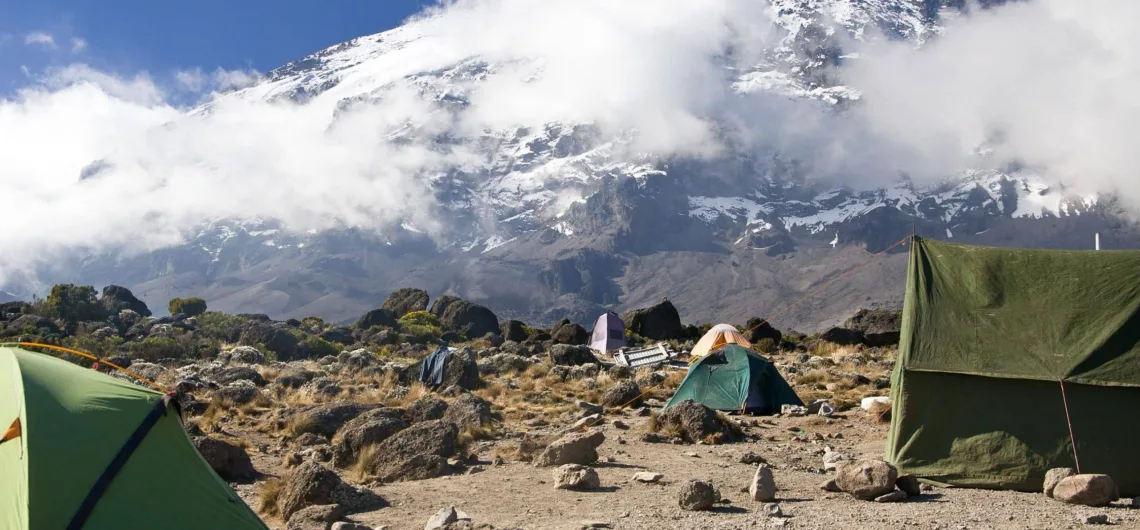
1. Barafu Camp (4,670 m / 15,320 ft) – The Southern “Ice Camp”
Routes: Lemosho (standard 7–8 days), Machame (6–7 days), Umbwe (6–7 days).
Notes: The most commonly used high camp is rocky, exposed, and often crowded (dozens of tents). Windy with spectacular views of Mawenzi Peak. Arrive mid-afternoon, rest, eat an early dinner, and try to sleep before the midnight start. More about the Barafu Camp.
Recommended itineraries:
Journey to Uhuru Peak:
- Elevation gain: ~1,225 m (4,020 ft) to the summit.
- Distance: ~5–6 km one way to Uhuru (plus return).
- Time: 7–9 hours up (midnight–2 a.m. start); reach Stella Point in 5–7 hours, then 30–60 minutes along the crater rim to Uhuru. Descent back to Barafu: 4–6 hours.
- Terrain & path: Steep zigzag switchbacks on loose scree and rock. Headlamp-only for the first 4–5 hours. The trail is well-worn but tiring—many describe it as “two steps up, one slide back.” You hit Stella Point (5,739 m) on the crater rim first (a major psychological milestone with a sign and views). From Stella, a gentler 1 km traverse west along the snowy/icy rim leads to Uhuru. Sunrise often hits during this final section.
- Challenges: Longest summit night among southern options; crowds can create bottlenecks on the switchbacks.
This is the default for most southern-route climbers and ties directly into the dehydration and gear strategies we’ve covered—hydrate aggressively here, as the dry air and exertion are brutal.
2. Kosovo Camp (4,870 m / 15,978 ft) – The Higher, Quieter Alternative
Routes: Lemosho (preferred on 8–9 day itineraries), Machame, or Umbwe when operators choose the upgrade.
Notes: Located ~200 m / 650 ft above Barafu on the same southern slopes. Quieter, fewer tents, and it gives a meaningful head start. Some premium operators default to it for better success rates (up to 95–100% on well-acclimatized groups). More exposed and colder, but worth it for the shorter night. More about Kosovo Camp.
Recommended itineraries
Journey to Uhuru Peak:
- Elevation gain: ~1,025 m (3,363 ft) to summit (saves ~1–2 hours vs. Barafu).
- Distance: ~4–5 km one way.
- Time: 6–8 hours up (often start 12:30–1:30 a.m.); reach Stella Point faster (4–6 hours), then the same 30–60 min rim walk to Uhuru.
- Terrain & path: Same zigzag scree trail as Barafu but skips the initial rocky grind. Still steep, but you’re higher sooner, so the psychological load feels lighter. Stella Point → crater rim → Uhuru is identical.
- Advantages: More rest time before departure, fewer crowds, and often a daylight crossing of the rocky section between Barafu and Kosovo on the way up (done the previous afternoon). This is a favorite on the longer non-touristic Lemosho profiles we discussed earlier.
3. Kibo Hut (4,700 m / 15,420 ft) – The Hutted Eastern Gateway
Routes: Marangu (5–6 days, hut-based), Rongai (6–7 days).
Notes: Basic dormitory-style stone huts (no tents needed on Marangu). Less crowded than Barafu but still busy. Rongai climbers reach it after crossing the saddle from Mawenzi. More about the Kibo hut.
Recommended itineraries.
Journey to Uhuru Peak:
- Elevation gain: ~1,195 m (3,921 ft) to the summit.
- Distance: ~5–6 km one way.
- Time: 8–10+ hours up (often called the “toughest” summit night because the camp is farther from the rim). Reach Gilman’s Point in 5–7 hours, then 1–2 hours across the rim to Uhuru.
- Terrain & path: Steeper and longer switchbacks on scree than the southern routes. You crest at Gilman’s Point (5,685 m) on the northeastern crater rim first (a rocky outcrop with a sign). From there, a scenic but exposed traverse along the rim (sometimes snowy) heads southwest to Uhuru. The extra distance and steeper early sections make this feel more demanding—many operators note it as mentally tougher.
This aligns with Rongai’s quieter northern feel but requires strong pacing and the electrolyte/hydration discipline we outlined.
4. School Hut (4,750–4,800 m / 15,580–15,750 ft) – The Northern Circuit’s Remote Base
Routes: Northern Circuit (8–10 days); sometimes extended to Rongai.
Notes: One of the quietest high camps—alpine desert solitude with basic huts/tent sites. Excellent for the 360° views and superior acclimatization of the Northern Circuit. More about School Hut
Recommended itineraries
Journey to Uhuru Peak:
- Elevation gain: ~1,095–1,145 m (3,593–3,757 ft).
- Distance: ~5–6 km.
- Time: 7–9 hours up; similar to Kibo but with a slightly shorter approach to the rim.
- Terrain & path: Gradual then steep ascent on the northern slopes to Gilman’s Point (or occasionally direct toward Stella depending on exact trail), followed by the crater-rim traverse to Uhuru. The northern approach can feel more windswept but offers unique perspectives across the Kenyan border before joining the rim path.
This camp perfectly complements the non-touristic Northern Circuit you asked about earlier—fewer groups, better rest, and that “only ones on the mountain” vibe.
5. Crater Camp (5,700–5,800 m / 18,700–19,029 ft) – The Ultimate High-Altitude Option
Routes: Available as an add-on (extra permit ~$100–150) on Lemosho, Northern Circuit, Machame, or Umbwe after reaching the rim via Stella Point. Not a starting high camp but a rare overnight inside Kibo’s caldera.
Notes: Only for highly acclimatized, experienced climbers (excellent prior altitude history). Extremely cold, minimal facilities, high AMS risk—but the reward is sleeping inside Africa’s highest volcanic crater with glaciers and the summit a short walk away. About the Crater Camp on Kibo cone.
Recommended itineraries
Journey to Uhuru Peak:
- Elevation gain: Just 95–195 m (312–640 ft).
- Distance: ~1–1.5 km.
- Time: 30–90 minutes at dawn (no full night push needed).
- Terrain & path: Gentle walk across the crater floor (ash, snow patches, and ice) straight to Uhuru. You wake up, have breakfast, and stroll to the summit for sunrise—by far the easiest and most magical final leg. Descent is back through the crater and down the standard route.
This is the rare “unlock” for 2027–2028 climbers who’ve followed the longer itineraries and natural remedies we’ve discussed—it turns summit night into a dawn celebration.
Quick Route-to-High-Camp Summary
- Marangu: Kibo Hut → Gilman’s → Uhuru (hutted, shorter overall trek but tougher final night).
- Rongai: Kibo Hut (or School Hut on extensions) → Gilman’s → Uhuru (northern solitude).
- Machame / Umbwe: Barafu or Kosovo → Stella → Uhuru (scenic but busier southern slopes).
- Lemosho / Shira: Barafu or Kosovo (Kosovo preferred on longer plans) → Stella → Uhuru (or Crater Camp add-on).
- Northern Circuit: School Hut → Gilman’s/Stella → Uhuru (quietest, best acclimatization; Crater Camp possible).
No matter which high camp you reach, success hinges on the layered prep we’ve covered: 4–5 liters of hydration with electrolytes, Rhodiola/ginger support, mineral sunscreen + glacier glasses, and “pole pole” pacing. The journey from any of these camps is never easy—but it’s profoundly rewarding when the first light paints the glaciers, and you step onto Uhuru, Africa’s true roof. Choose your route and camp deliberately (longer = quieter + higher success), and the final push becomes the culmination of everything you’ve trained for.
What is the difference between a basecamp and a highcamp?
A basecamp generally refers to a central staging area where supplies and personnel are organized before undertaking a major expedition, such as summiting to the summit of Kilimanjaro, Meru, or Mount Kenya. A High Camp, on the other hand, is the highest established camp on a climbing route, acting as the final staging area for a summit push. Unlike lower camps or base camps, it is designed for living in extreme, high-altitude conditions while climbers wait for favorable weather and finish.
![]()